
This project have required following depandency
Laravel Requirements (Server Requirements)
PHP.INI Requirements
File and folder permissions
Flutter/iOS Requirements
| npm install |


| npm run dev |
Email : admin@admin.com
Password : 12345678
Steps to Set Up the GymLty Web Panel

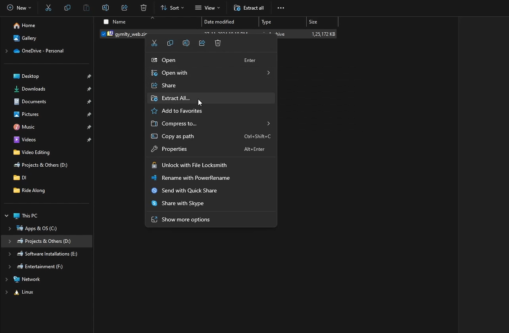
Choose the GymLty Web Zip File .
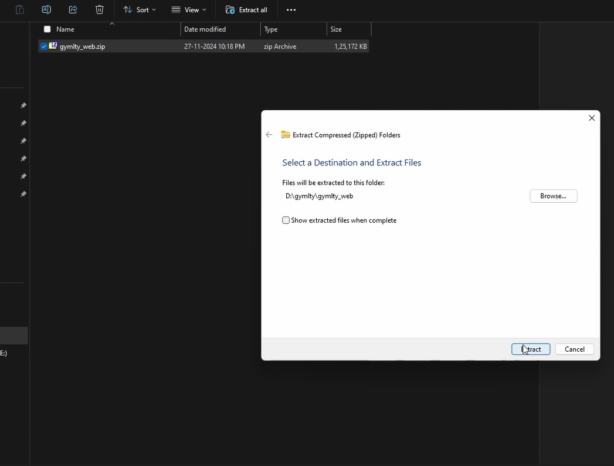
 Locate and extract the GymLty web zip file to a folder.
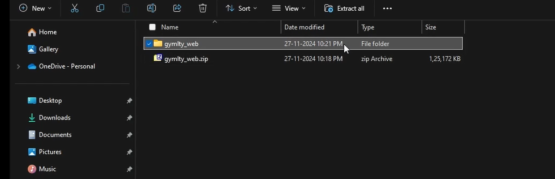

Open the Extracted Folder
Navigate to the extracted folder to access the files.

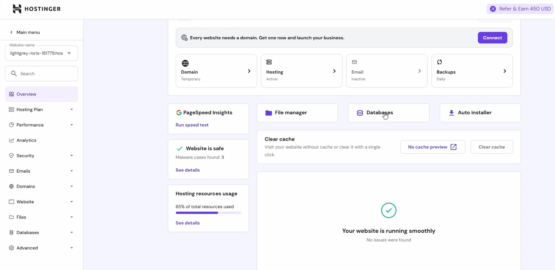
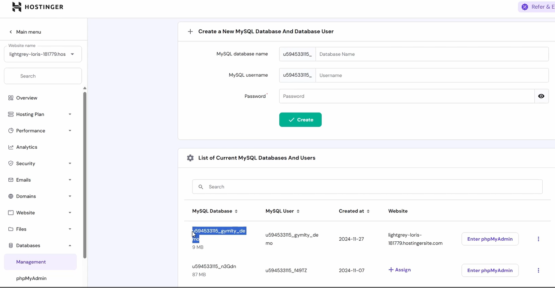
Go to Database
Access the MySQL database configuration panel.

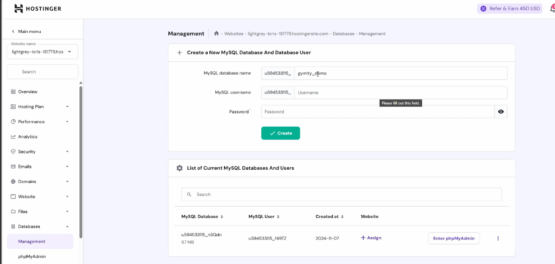
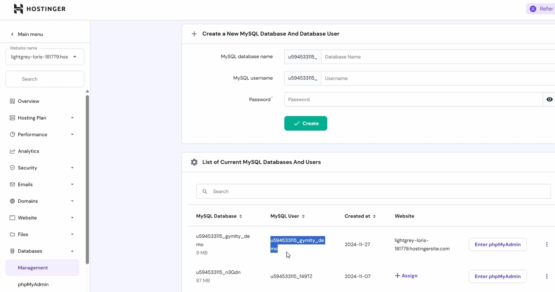
Fill Database Credentials.
Enter your MySQL database name, username, and password.
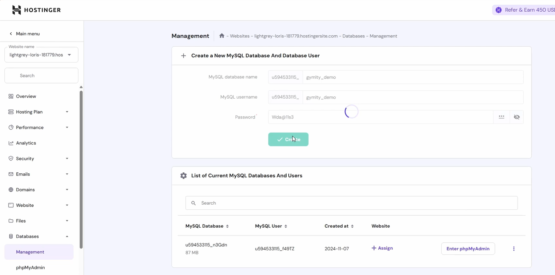
Click Create Button
Click on the “Create” button to set up the database.

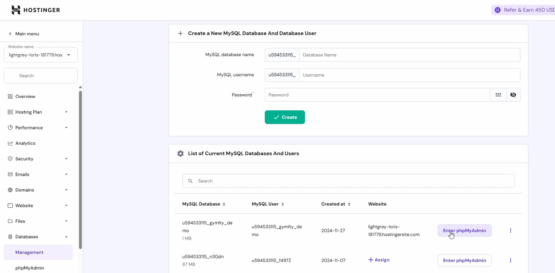
Access phpMyAdmin via Hostinger
Log in to Hostinger and access phpMyAdmin.

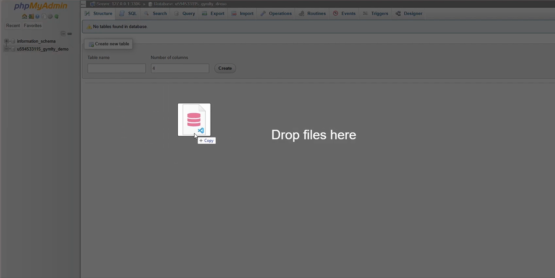
Import SQL File


Upload the provided SQL file into your database.
View Database Tables
After importing, all database tables will be displayed.

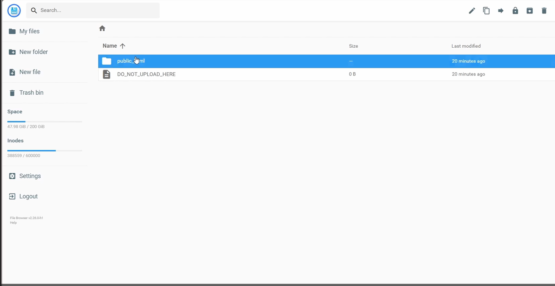
Access Files in Hostinger
Go to Hostinger, navigate to the File Manager, and access your files.
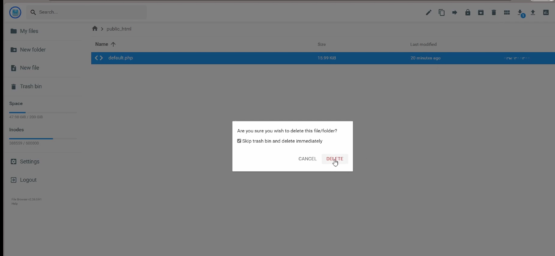

Delete Default PHP File
In the public_html folder, delete the default PHP file.

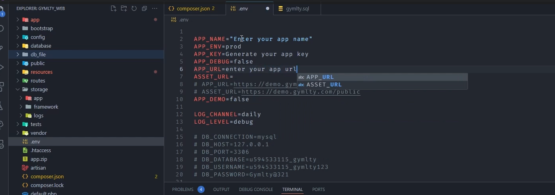
Update Application Details in VS Code

Change the app_url to your application URL.
Copy the path from Hostinger and replace it.

Set DB_DATABASE to your MySQL database name.

Set DB_USERNAME to your MySQL username.

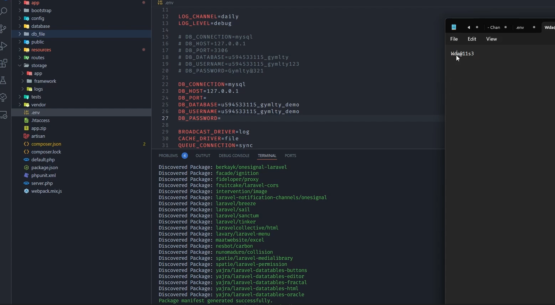
Enter the previously used database password. Then save the file

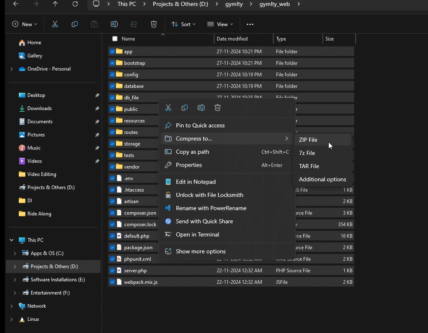
Compress all the saved files to zip format.
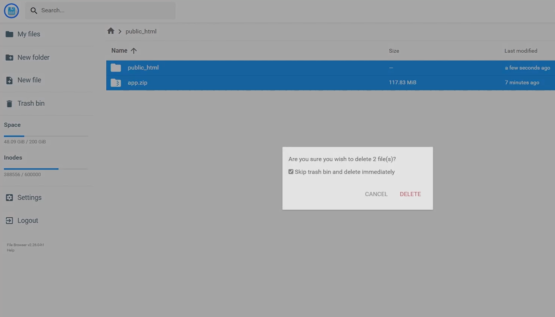

Delete the existing public_html and db_file.zip.

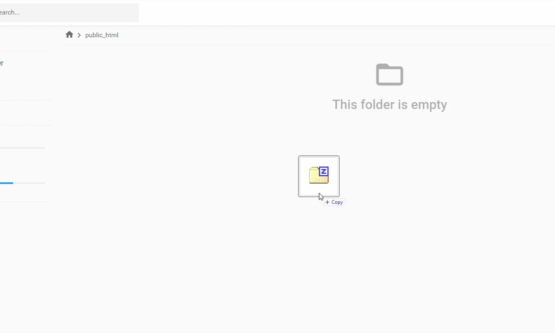
Upload the newly compressed zip file to the public_html folder.


Choose the name of the Folder.

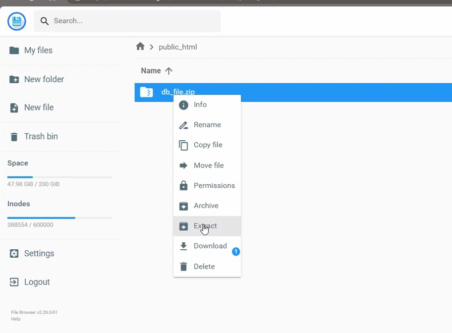
Extract Uploaded Zip File
Extract the zip file in public_html.

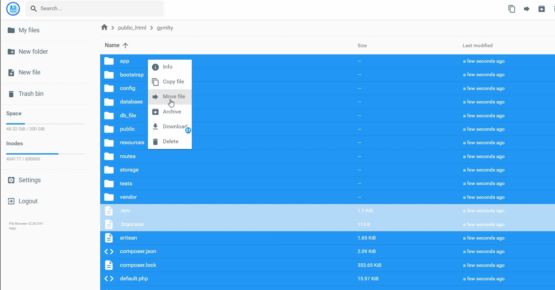
Move Extracted Files
Select all extracted files, right-click, and move them to a new folder.

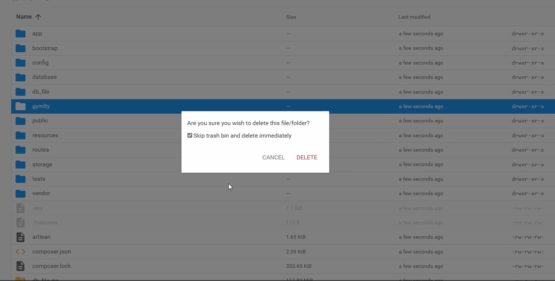

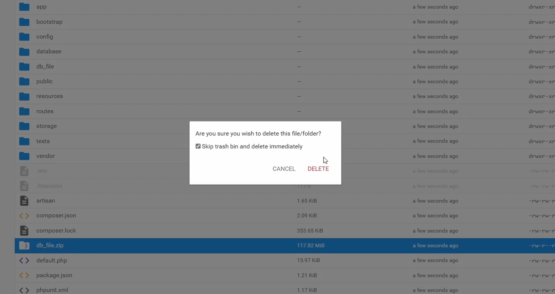
Delete Unnecessary Files.
Delete the old GymLty folder and db_file.zip.
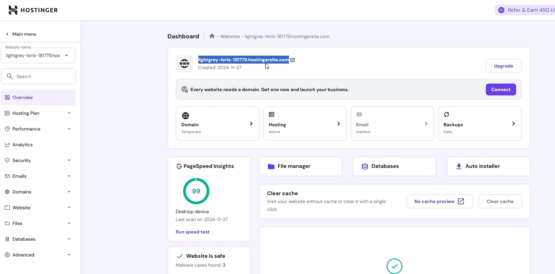
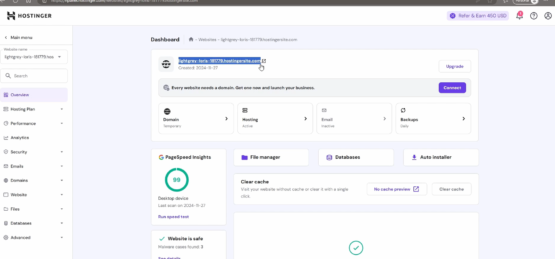
Copy your Hostinger URL.

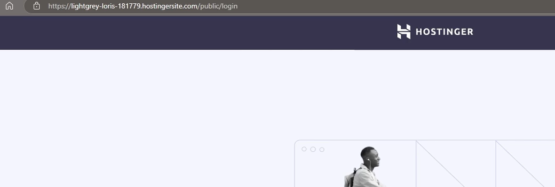
Open it in a new browser tab and add /public/login to the URL.

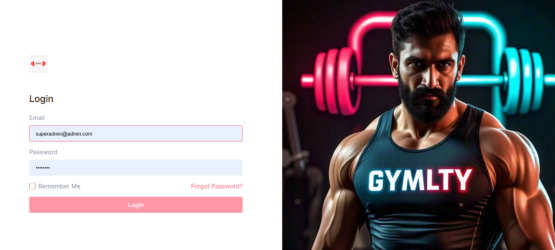
Access the Admin Panel
The All Time Fitness Web Panel is now ready for use!


Important: Choose Your Platform And Follow Steps To Build And Run Application.
Here are the requirements for mobile configuration in Markdown format:
Firebase provides tools to grow your app and business, offering fully managed backend infrastructure and features for app development. Visit Firebase for more information.
gymlty Fitness Laravel currently supports eight payment gateways. Here Some two examples are given below.

In the main directory, go to open android/app/src/main/AndroidManifest.xml and specify your application name.
IMPORTANT
Android Studio includes a tool called Image Asset Studio that helps you generate your own app icons from material icons, custom images, and text strings. It generates a set of icons at the appropriate resolution for each pixel density that your app supports. Image Asset Studio places the newly generated icons in density-specific folders under the res/ directory in your project. At runtime, Android uses the appropriate resource based on the screen density of the device your app is running on.
Image Asset Studio helps you generate the following icon types:
For More Details You can checkout Android Studio Editor Guide for creating Android Icons.
INFO
Foreground Layer : The foreground layer is the primary part of the icon that contains the main visual elements. It’s the layer that the user selects the source asset for, which can be an image, clip art or text.
Background Layer : The background layer is the area behind the foreground layer. It can be used to add a background color or image element to the icon. If you don’t want green background for laucher Icon then set background layer suitable to your Launcher Icon.
The basic process of this website is –
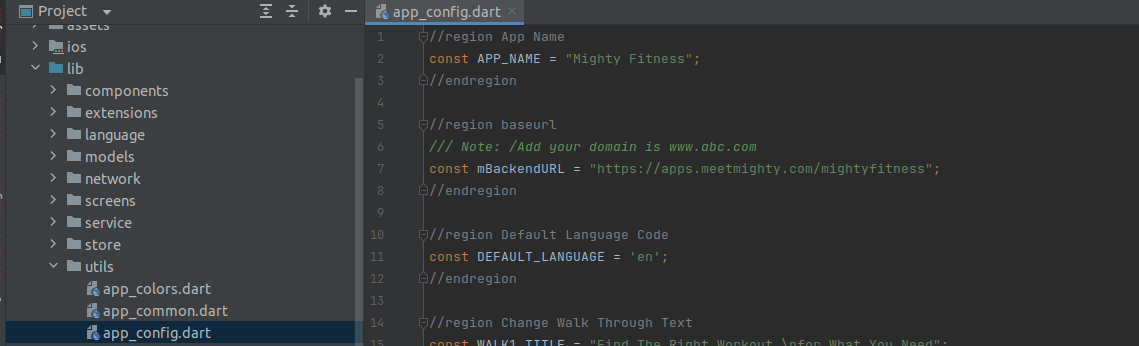
Change notification icon in Androidmanifest.xml
INFO
Update notification icon name into “lib → utils → push_notification_service.dart” Follow the Steps mentioned in Flutter Configuration
INFO
As part of enabling Google APIs or Firebase services in your Android application, you need to set up Firebase and download the Google JSON file.
Click Here to set up Firebase and download the Google JSON file.
To generate a signed APK (Android Package), follow these steps:


If you choose to use an existing keystore, simply select it.
After selecting your keystore or creating a new one, click Next.
Choose the release mode and proceed with building the APK.
NOTE
If you intend to publish your app on the Google Play Store, you will need the AAB (Android App Bundle) format. To create an AAB, follow the same steps mentioned above, but in step 2, select the AAB option instead of APK.
IMPORTANT
Every Android app has a unique application ID that looks like a Java package name, such as com.example.myapp. This ID uniquely identifies your app on the
device and in the Google Play Store. Once you publish your app, you should never change the Application ID.
IMPORTANT
The version name is a string value that represents the “friendly” version name displayed to the users. The version name is displayed to the user.
IMPORTANT
The version code is an incremental integer value that represents the version of the application code. The version code is used by the Google Play Store for new updates. If you increase the version code, the update will be visible to all users.
IMPORTANT
To change the name of your Android application in Android Studio, you have to change the value of the property android:label defined inside the node in AndroidManifest.xml.


keytool -genkey -v -keystore android/example.jks -alias example -keyalg RSA -keysize 2048 -validity 10000
Here,
The command will generate a JKS file in your android directory. The validity of the keystore certificate is set to 10,000 days. If you don’t add “-validity “, the default value will be 90 days.
Note: If you encounter an error like ‘Command ‘keytool’ not found’, you’ll also receive a suggestion to install keytool. Follow the suggestion and execute the command to install ‘keytool’.
After installing keytool, run the ‘keytool’ command again and complete the process again.


These Keystore File Path,Keystore Password, Key Alias , Alias Password, you’ve to set in keystore.properties file which will be in android directory of project. If it’s not available then just right click on android directory → New → File and name it as ‘key.properties’. Then you can perform steps mentioned here


Wait for a while it will generate your SHA Copy Both SHA1 and SHA256 for variant & config Debug and Release and add to Firebase


By following these steps, you can change the Bundle Name for your iOS target in Xcode.
The Bundle Identifier is a unique identifier of your app on iOS and macOS. It must be unique for your app.
To enable Google SignIn in your app:
To enable SignIn with Apple in your project:
1 | const APP_NAME ="ADD_YOUR_DOMAIN_URL" |
In the main directory, go to lib → utils → app_colors.dart
In main directory goto the lib -> utils -> app_config.dart
1 | const mOneSignalID = ‘CHANGE_ONE_SIGNAL_KEY’; |


If you don’t have .p12 Certificate then, First Generate .p12 Certificate. Here is guide to Generate iOS Certificate
Welcome to Stripe! In this guide, you will learn how to sign up for a Stripe account and obtain API keys necessary for integrating Stripe into your website or application.
STRIPE PAYMENT GATEWAY
Stripe is the best software platform for running an internet business.We handle billions of dollars every year for forward-thinking businesses around the world.
Click here For more details about the Stripe payment gateway.
If you have an existing Stripe Developer Account, Log in to the account.
Otherwise, Sign up and create a new business account.


Now you’ve successfully generated keys please navigate to Admin Panel and follow the steps mentioned below

Name | Description |
4242 4242 4242 4242 | Succeeds and immediately processes the payment. |
4000 0025 0000 3155 | Requires authentication. Stripe will trigger a modal asking for the customer to authenticate. |
4000 0000 0000 9995 | Always fails with a decline code of insufficient_funds. |
Remove Payment
Download the SDK and point the SDK folder path in your future projects.
There are different sources you can try
If you the error like shown below while uploading app to Store follow the mentioned step in image.
Solution : Follow the steps shown in Image.
If you encounter the “Unsupported Gradle Version” error with a version number like 3.., you can follow these steps to resolve it:
By following these steps, you should be able to resolve the “Unsupported Gradle Version” error and run your application successfully
If you continue to experience issues or encounter any other errors, make sure to check for updates to your Gradle version and ensure that it is compatible with your project requirements. Additionally, consult the official documentation or seek support from the Android Studio community for further assistance.
Special Notes
As per envato policy installation, setup and configurations or modification are not included in free support. Free support is only for any bug/ error in original code. we do not provide installation and customization support in FREE SUPPORT.
Still, We are providing steps for How to update future release code to existing source code for your knowledge purpose.
PLEASE DO NOT CREATE TICKETS IF YOU FACE ANY ISSUE DURING UPDATE YOUR CODE. WE WILL NOT PROVIDE ANY SUPPORT ON THAT.
If you want which file changes are on the latest updated version then you have to manage the git repository by yourself.
For First time: Initial project downloaded from codecanyon server.
Step 1: Create or login with gitlab
Login or register your account with gitlab: https://gitlab.com/users/sign_in
Step 2: Create a new project in GitLab


 4. Once successfully clone then system will create a folder on your system
Once successfully downloaded project from codecanyon, copy/paste your downloaded project into clone directories
Step 6: Commit and push to gitlab server
Onces copy/paste your changes to clone directres, you have to push all files to your gitlab server. For that use the following commands.
Before commit to server directores, you have to remove below folder from your project
After That follow below steps
 2. Add your all files with “git add .” command
 5. Push your changes to server with below command
 6. Check your all changes to gitlab server
Note
If you remove the project from the local system then clone the project again from your gitlab server. Follow the same above Step 3: Clone your project to your local system
Step 1: Download the latest version from codecanyon server.
Once you will received mail for updates. Just download latest code from codecanyon server.
Step 2: Copy/paste your initial downloaded project to clone directories.
Once successfully downloaded project from codecanyon, copy/paste your downloaded project into clone directories
Note
Only orignal source code is put here.
Step 3: Commit and push to gitlab server
Follow same Step 6: Commit and push to gitlab server
Step 4: Check updated files
After committing your latest changes. Goto the gitlab project dashboard and click on the commit link.
Click on link which you have commit message on above steps 3
Now check the all changed file.
Click on “XYZ changed file” to see which file has been changed.


